Here is an excellent post from Fighting Arts Forum that indexes a lot of the bodyweight exercise tutorials on the internet. It's quite long but worth the read.
"A lot of people have been asking about exercises that can be done with no equipment or with minimal equipment. In the absence of a really good website listing such exercises, I figured we need a list of exercises here, which will hopefully answer most of the questions people have about such training.
There are those who think that bodyweight alone cannot offer enough resistance to give strength gains in most people. The fact is that although the weight of the body is constant, the resistance applied to the target muscles can still be made very great by loading the weight onto limbs (e.g. moving to a one-limbed version of a standard bodyweight exercise like push-ups, or by elevating the feet in a push-up so that a greater fraction of the body's weight is being pressed), by manipulating leverage (e.g. extending the legs in front during a pull-up) or by pausing in the middle of a rep to eliminate momentum. The next time you hear somebody tell you that bodyweight alone is not enough for strength gains, ask them if they can do a Maltese cross. An interesting read about bodyweight strength training is T-nation's interview with gymnastics coach Cristhopher Sommer. (Christopher Sommer will have a book coming out on bodyweight training at some unspecified date. I, for one, am greatly looking forward to it.) Another good read about the theory and practise of bodyweight strength training is Pavel Tsatsouline's The Naked Warrior.
It is gymnasts who make the best use of sophisticated bodyweight training methods. (By the way, gymnastic rings are about the best upper-body conditioning tool there is, but as this thread is intended for people who don't have the use of weights, I'm guessing you won't have those either.) The game of gymnastics is the game of controlling one's body through space. For this reason, I think it's beneficial for most athletes and martial artists to try to master the basics of gymnastics, not to mention that the performance of the skills themselves will build strength and power and can be considered a form of bodyweight conditioning. It is because gymnastic and bodyweight exercises teach you to control your body that I prefer them to exercises with weights where I have the choice between the two. On the other hand, as TimBlack said in another thread, "While it may theoretically be possible to keep increasing the effective load on your muscles by bending yourself into all kinds of painful and weird positions, it is just plain easier to use weights to increase resistance." Quite right.
Before I get on to the usual methods of lifting your bodyweight from different positions, let me mention a form of strength training requiring no equipment whatever that I feel has been overlooked:
Anything that's written on flexibility these days (rightly) touts isometric stretching as the best method for gaining flexibility, and will usually give a brief mention to the fact that it simultaneously improves strength. I think the efficacy of this type of training at building strength has been understated. Hettinger and Maller showed in 1953 that you can increase strength by 5% in a week by holding a static contraction against a fixed object for only six seconds a day. Isometric strength training became popular during the 60s and 70s, but then mysteriously dropped out of fashion.
Conventional isometric training had two big drawbacks: Firstly, your nervous system will respond to contractions in a shortened position by resetting the limit of the range of motion nearer to that point. In other words, isometrics decrease flexibility. Secondly, the strength gains, though significant in themselves, are angle-specific. So pressing forwards isometrically will increase your strength at pressing forwards, but not pressing outwards, overhead, or at any angle more than 15 or 20 degrees to either side of the angle trained.
Isometric stretching overcomes both these problems. Not only does it rapidly increase your flexibility, rather than decrease it, it also gives strength gains across a full range of motion for the muscles trained. There are different schools of thought on how long contractions should be held. It appears that the total time under tension (i.e. across all reps and sets) is the key variable in strength gains, and that longer contractions (more than six seconds) are more likely to cause increases in muscle size. I find that four tensions or 6-8 seconds works well for me, but I advise you to experiment.
It should be noted that isometrics are not recommended for children and teenagers whose bones are still growing. Note also that you will get the best results if you rest a muscle group for a day between isometric stretching sessions. Any attempt to gain strength through isometrics alone will invariably lead to a plateau after 6-8 weeks. Normal, dynamic strength training is also needed. You can find out more about isometric stretching in the stretching forum.
Part of my aim in this thread is to dispel the view of bodyweight exercises as high-rep, endurance work that can't build strength. To that end, I've included some outrageously hard exercises that no one here will be able to do. A lot of the exercises below do involves quite low resistance, but I think I've included enough difficult ones to keep just about anyone challenged. Needless to say, this list is by no means exhaustive, but I think it should contain enough to develop anyone's strength, endurance and power. I have categorised the exercises under the body part they seem to target, but many work other body parts as well. For example, push-ups require the muscles of the core for stability, handstands stress the whole of the torso etc.
LEGS
The legs are designed to move the bodyweight around, so it can be difficult to put them at a disadvantaged enough position to really challenge their strength. The glute-ham raise and the more difficult variations of the one-legged squat are probably the only ones that will challenge most people here. See plyometric drills at the bottom of the page for explosive speed drills for the legs. Master the basic squat first of all; it will teach you proper knee alignment which is needed to do many of these drills safely. Remember that the human knee is designed only to flex and extend, not to bow from side to side.
Squats. If you're interested in conditioning, bodyweight or otherwise, you must learn how to squat perfectly, as you are guaranteed to damage your knees otherwise, so I'll give quite a bit of detail on the form of this exercise. Crouch down and experiment with the distance between your feet and the outward turn of the ankle until you've found a position in which you can sit for several minutes without any discomfort. Now, without moving your feet, stand up. Crouch down again. Repeat. For the duration of the exercise, keep your spine straight and your head held as high as possible. Look slightly up. Keep your midsection tensed. Don't let your knees bow in or out; they should move along the lines of the feet. The body moves straight up and down, never forward or back. One very useful, though somewhat odd, tip is to try and elongate an imaginary line running from the bottom of the kneecap to the bottom to the quadriceps as you squat.
One-legged squat (pistols). These are a great exercise for strength. Not only do they work the thighs and hip flexion and extension, as does any squatting movement, but hip adductors and abductors are also needed to keep balance. Here is a great article on how to do them. Read it. To make pistols more difficult, pause halfway through the rep. A really difficult bodyweight leg drill is to squat rock-bottom as in a normal pistol, then jump up from the bottom position rather than standing up slowly. Christopher Sommer writes, "The goal here is to try to explode out of the bottom; not to 3/4s stand and then hop." If you still feel you're not challenged, try to jump in this way onto a box in front of you, for distance or height or both. Be very careful about knee alignment with pistols. Everything above about knee alignment for squats applies here too. It is worth sitting in the bottom position for a few minutes until you find the comfortable alignment. The fact that you have to balance on one leg causes a lot of people to wobble from side to side; this can be damaging to the knee.
Bootstrappers. http://www.trainforstrength.com/ex-2.shtml. Essentially a squat in which some of the bodyweight is taken on the hands. These can also be done on one leg.
Bleacher squats. Elevate one foot on a chair or box and squat down from that position.
Wall sits. An endurance exercise for the thighs and glutes. Sit like this with your thighs parallel to the ground, your shins vertical and your back against a wall. Make sure there are right angles between the floor, your shins, your thighs and your body. You should feel a burn in your thighs and buttocks, but if you feel it in your knees, you're doing it wrong. When you can't take no more, stand up out of it; do not slump to the ground.
Hindu squats. These work the calves, thighs and hips. Here is an animation of the exercise. It is more difficult to maintain proper knee alignment for these than for regular squats. If you allow your knees to wobble from side to side during the movement, you are damaging your knees.
Lunges. http://www.healthatoz.com/healthatoz/Atoz/hl/fit/demo/lunges.jsp. Don't rotate your hips; keep them facing forward.
Off-bench lunges. http://ronjones.org/Coach&Train/ExercisePhotos/Legs/Lunge-OffBench.html
Renegade lunges. An excellent movement for training lateral movement, which is very useful to the martial artist. Stand with a bar or something beside you at waist height. Squat down and push sideways off the foot furthest from the bar to come up on the other side. The lower you set the bar, the more difficult the drill is.
Dragon twisting. http://fullkontact.com/a_dragon.html
Backward lunges. The same as regular lunges, except stepping backwards instead of forwards. Make sure the hips stay pointed forward.
One-legged deadlift. Stand on one leg with the other bent slightly behind you. Leaning forward for balance, bend the knee of the supporting leg until the knee of theother leg touches the ground.
Mountain climbers. The starting position resembles a push-up position, except that one leg is tucked in so that the knee is near the chest like this. Switch legs quickly.
Squat thrusts. Similar to mountain climbers, except both legs come in and out together. It's like switching explosively between squatting and push-ups positions.
Burpees. A squat thrust with a jump. An explosive drill for the whole body and great for endurance work (both muscular and cardiorespiratory). http://www.bodybuilding.com/fun/rossboxing2.htm
Glute-ham sit-up. A very difficult exercise. Lie face down with your feet anchored. Pull yourself into a kneeling position by bending your knees.
Calf raises. From standing, simply rise up onto the ball of your foot. Can be done with one foot or two. It's a good idea to elevate the toes on a book in order to increase the range of motion.
CORE
The word 'core' is a catch-all term for the muscles of the midsection, including the rectus abdominis, oblique abdominis externis, oblique abdominis internus, transverse abdominis and spinal erectae. Bodyweight core conditioning is notorious for low-intensity exercises like crunches. While I have listed these for the sake of completeness, I don't consider them to be of much value. The only core conditioning I do these days is gymnastic-style body tension work like manna and planche progressions, dragon flags and levers, along with occasional Janda sit-ups or ab wheel rollouts. These provide the high resistance needed to build strength.
Planche progressions. http://www.dragondoor.com/articler/mode3/229/. These also work the arms, shoulders, legs, pretty much everything. One progression not mentioned on the linked page is the frog stance with one leg extended behind, which breakdancers call a two-handed airbaby.
Manna progressions. L-sit > V-sit - legs are perpindicular to the floor > Manna - legs are parallel to the floor. When you can hold one position for 60 seconds, try the next progression.
Front lever. You'll need a pull-up bar or something else to hang from. http://www.dragondoor.com/articler/mode3/229/
Back lever. http://beastskills.com/Back%20lever.htm
Dragon flags. The flag, also called Dragon flag after Bruce Lee, has been called the best abdominal exercise of all, with good cause. The pictures here describe it better than I can. (It's the one halfway down the page involving the bench.) It has an advantage over the gymnastic holds above because it works the core dynamically through a range of angles. You can work up to this by doing negatives, i.e. Get into the top position by tucking your knees to your chest and extending them upwards, then lower your legs slowly. Even this will be beyond the reach of many.
Rainbows. Starting in a planche, rotate your body upwards into a handstand, then down into an upward-facing planche and back. It has been done.
Sit-ups/ crunches. The aim in sit-ups should be to roll the spine up like a mat, not to bend from the hips. Consciously try to maximise the contraction of the abs. Crunches are different in that the lower back stays on the ground. Either movement can be made harder by extending the arms above the head or by elevating the feet.
Air bike. http://www.bodybuilding.com/fun/exercises.php?Name=Air+Bike
Janda sit-ups. Get into a normal sit-up position with the knees bent at a right angle. Secure something under your knees (I use a doorframe pull-up bar) or else have a partner put their hands under your knees and pull. Now drive your feet into the ground and pull your calves back against whatever's under your knees. Hold this tension throughout the exercise. Now perform a sit-up. It should be much harder than a regular sit-up; if it's not, you're not tensing hard enough. This exercise works by eliminating the hip flexors from the sit-up movement by tensing its antagonists - the hamstrings and glutes. This means the rectus abdominis must do all the work. You can work the obliques more by putting more pressure on one foot than the other.
Hanging leg raises. http://www.dragondoor.com/articler/mode3/329/
Lying leg thrust. Lie on the floor face up. Flatten your lower back into the floor. Now bring one leg or both (the two-legged version is harder) up to point to the ceiling. Your lower back must remain pressed to the ground at all times; it should not be possible for you to slide a hand between your back and the floor. Keep you midsection tight and hold your breath throughout the exercise.
Wheel roll-out. http://www.bronzebowpublishing.com/Superman.gif. An easier variation is to start with the knees on the ground instead of the feet. Ab wheels can be purchased very cheaply, or you can use a barbell, dumbbell, a chair with wheels, rollerskates, or make your own wheel.
Pike pull-in with wheel. http://www.bodybuilding.com/fun/clark1_2.jpg.
Hollow rock. Video and slideshow here
Chinnies. Lie flat on the ground with your hands held lightly behind your head. Bring your left knee and your right elbow together, relax, bring your right knee and your left elbow together. Repeat.
Russian twists. Holding the middle position of a crunch, with your hands together in front of you, twist your body and arms from side to side.
V-ups. Lie flat on the ground. Now simultaneously lift your back and legs off the floor to come to this position
Farmer Burns' stomach flattener. Inhale deeply. Now try to push the air out of your lungs with your abdominal muscles, but keep your glottis closed so the air is held in. Hold for a few seconds.
Isometric tension. The simplest way to strengthen the abs is to just tense them as if you were bracing for a punch.
Vacuum. Exhale maximally. Suck in your abdomen and hold for six seconds or so, while holding your breath. Inhale, relax and get your breath back before repeating. This exercise works the transverse abdominis.
Shoulderstand. Lie on the floor and raise your legs into this position. Do not tuck your knees in to your chest at any point.
Twisting sit-up or crunch. Twist to the side whil performing a sit-up or crunch. This variation works the obliques.
Frog kick. Hanging from a pull-up bar or something similar, bring your knees to your chest.
Back hyperextensions. Lie face down and bring your chest, legs and hips off the ground.
Knee hugs. Lie on the ground face up and bring your upper back off the ground as in a crunch while tucking in your knees.
Scissor kicks. http://www.bodybuilding.com/fun/exercises.php?Name=Scissor+Kick
Plank. Hold the position at the top of a push-up for several minutes, without letting your hips sag. An endurance exercise.
Side plank. Hold this position
Lying hip swings. Lie face up and lift your hips and legs off the ground with your feet together. Now swing your legs from side to side.
Flutter kick. Video
Bridge. Hold this position.
Wall Walking. Stand with your back to a wall. You'll need to experiment to find the right distance. Lean backwards and put your hands on the wall. Now walk your hands down the wall (ideally all the way down to the floor) and walk them back up.
Side bends. Stand with your hands overhead and bend sideways. Keep facing forward; do not twist.
Waist twists. Stand with your feet about twice your shoulder-width apart. Bend your knees slightly and twist from the waist. Your hips should stay facing forward.
Side crunches. Lie on your side and bring your shoulder, hips and legs off the floor.
PRESSING
These exercises target the upper body pressing muscles - triceps, pectorals, anterior deltoids. Note that for these, and any exercise that involves supporting all or some of the bodyweight on the hands, a variety of hand positions are possible. You can do them on your fists to strengthen the wrists or to condition your knuckles; you can do them on all 10 of your fingertips, or on as few fingertips as your strength will allow. This is a great way of building strength in the hands. Doing them on the backs of your hands in an attempt to strengthen the wrists is not a good idea and will likely lead to tendon damage. The further apart your hands are, the more the pectorals are worked, whereas having your hands close together shifts the focus to the triceps.
Push-ups. http://www.ehow.com/how_3190_proper-push-.html. Try them with only one leg on the ground to work the stabilizer muscles more. Try them with only one arm. Elevating the feet will make them harder; elevating the hands will make them easier. (This applies to all variations.)
Elevated push-up. Put your feet on a chair and each of your hands on a chair and perform push-ups so that your head dips down between the chairs at the bottom of the movement. This allows for a full range of motion, which makes the exercise more difficult rep-for-rep and is important if your martial art requires a good degree of shoulder flexibility.
Twisting push-ups. http://ronjones.org/Coach&Train/ExercisePhotos/PushUps/PushUp-LateralTwist.html
Jack LaLanne push-up. What better way to illustrate what a Jack LaLanne push-up is than a picture of Jack LaLanne doing a push-up? (On his fingertips! At age 90!) It's essentially a regular push-up with the arms extended out in front.
The other kind of Jack LaLanne push-up. Confusingly enough, there are two distinct exercises called Jack LaLanne push-ups. This one involves standing on a chair (or a box, or whatever) with the body piked so that the hands are on the ground near the chair. (The nearer the hands are to the chair, the more difficult the exercise is.) Now bend and straighten your arms.
Planche push-ups. See here for planche training. When you can do a planche (or even a tuck planche), try a push-up from that position.
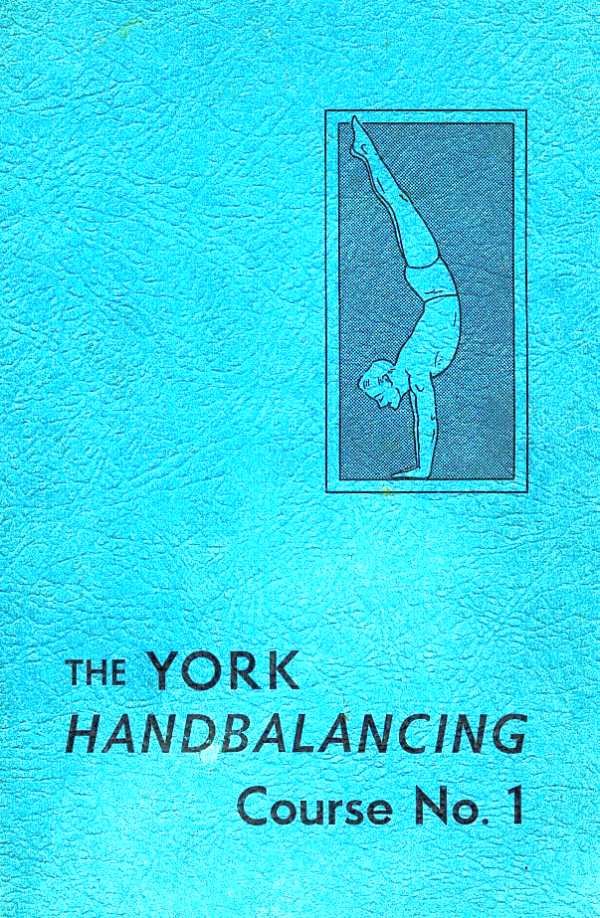
Handstand holds. http://beastskills.com/Handstand.htm. Also try one arm handstand holds, pirouettes from a handstand, and walking on your hands.
Handstand push-ups. From a handstand, bend your arms until your head touches the ground, and then straighten them again. You can work up to this by doing negatives (i.e. lowering yourself down without pushing back up) or by bending your arms as far as you can and pushing back up, and gradually increasing the depth of the push-up. When you can do a full, head-to-ground handstand push-up, you're still a long way off pushing through the full range of motion of your shoulders. Elevate your hands on chairs or whatever so that you can dip your head down between them. The next progression is the one-arm handstand push-up.
Handstand shrugs. From the handstand position, shrug your shoulders up and down. The focus is on the trapezius muscles.
Press into handstand. http://beastskills.com/Handstand%20press.htm
Dips. http://www.bodybuilding.com/fun/exercises.php?Name=Dips+-+Triceps+Version. (You don't need parallel bars, any two objects of the appropriate height, like two tables, will do.)
Dip swings. Execute a dip while swinging the body and legs forwards and backwards. This works the back, hips and torso as well.
Tiger bend. http://www.bronzebowpublishing.com/TigerBend.gif. Also try it with one arm, or from a handstand position.
Divebomber/ Hindu push-ups. In the divebomber push-up, you go from this starting position, to the bottom position of a normal push-up, to this position, then back into the bottom position of a push-up, then back to the starting position. In a Hindu push-up, on the other hand, when you reach this position, you push back directly to the starting position without lowering yourself back down. Also try it with only one arm or one leg.
T-pushups. Go down as in a normal push-up, and when coming up, turn your body sideways and bring one hand off the ground to point to the ceiling
Reverse push-up. http://www.jeremymarkum.com/fitness/fitportal/full-entry-exercise/how-to-perform-a-reverse-pushup/
PULLING
These exercises target the upper-body pulling muscles - biceps, latissimus dorsi, posterior deltoids. You can do most of these from a tree branch or monkey bars, but I strongly advise getting a telescoping pull-up bar that fits into a doorway. These can be got very cheaply and can be used for a wide variety of exercises. For all these pull-up variations, having your hands closer together will put more emphasis on the biceps, whereas having them further apart will put more emphasis on the lats.
Pull-ups/ chin-ups. If you want to get technical, pull-ups are done with your palms facing you, whereas chin-ups are done with the palms facing away from you, though most people use the terms interchangeably. Pull-ups put more emphasis on the biceps than chin-ups. Another option is to have one hand facing you, and the other hand facing away from you. If you do this, make sure to switch grips so that both sides are worked equally. I've listed the following variations as 'pull-ups'; this is merely for the sake of convenience and should not be taken to imply that a certain kind of grip must be used.
L-pull-up. A pull up from an L-hang position. Video and slideshow here. Not only are your hip flexors and abdominal muscles challenged by the L-hang, but the pull-up itself becomes more difficult as the bodyweight is pulling down at a greater leverage.
One hand pull-up. Not to be confused with the one-arm pull-up. This is a pull-up in which one hand is on the bar and the other grasps this hand at the wrist like so. This challenges the stabilizers more.
1 arm pull-up. http://beastskills.com/OneArmPull.htm
Fingertip pull-ups. Instead of gripping the bar in your hand, remove the thumb and hang by your fingertips. This variation is imposed by necessity if you don't have a pull-up bar, as you can hang off the top of a door. If you're looking for goals, Eugen Sandow could do pull-ups hanging by just one finger!
Towel pull-ups. Loop a towel (or something similar) around a pull-up bar and grab the hanging towel like this. This will work your grip strength and endurance.
'Commando' pull-ups. Hang from the bar facing sideways, and pull yourself up so that your right shoulder touches the bar. Lower yourself down and pull back up so that your left shoulder touches the bar. http://www.trainforstrength.com/images/mctop.jpg
Lever pull-ups. Try pull-ups from the front and back levers described under core exercises.
Kipping pull-ups. You'll find a video of it here under 'Pull-up (kipping)'. These are not as hard rep for rep as regular pull-ups, but involve far more of the musculature of the back and hips.
Pull-up hold. Pause half-way through a standard pull-up or chin-up. Hold.
Climbing stuff! Climb trees, fences, monkey bars at playgrounds, poles, ropes, rockfaces, mountains, whatever. Climbing trees is great because it requires you to pull your bodyweight up from an unpredictable variety of angles and leverages.
HANDS
Spider-ups. From a push-up position (or any position in which some of your weight is resting on your palms e.g. leaning against the wall, most of the pressing movements above) curl your fingers up into something resembling a crane beak hand position.
Tiger claw. This is an isometric hand-strengthening exercise borrowed from kung fu. Simply crook your fingers in this position as hard as you can for as long as you can. It takes some mental focus to maximise tension in all ten fingers, but it's a handy drill as it can be done anywhere at any time.
Note again that any exercise involving taking weight on your hands - from push-ups to handstands to planches - can be done on the fingertips, or on the tips of only a few fingers. This is an excellent way of strengthening your hands.
NECK
Wrestlers' bridge. Either hold this position or else roll from the forehead to the top of the head and back.
Front bridge on neck. http://img115.echo.cx/img115/956/wb24dm.jpg. Can also be done either statically or rolling from the forehead to the tip of the head. Another version is to roll between the front bridge and wrestlers' bridge positions.
Self-resisting isometrics. By far the safest way of strengthening your neck. Just place your hands on your head and push against them with your neck. Repeat in six directions - looking down, looking up, looking left, looking right, tiliting the head right, tilting it left.
Headstand. http://www.pess.nie.edu.sg/ppt/image/Headstand.gif
PLYOMETRICS
Plyometrics are exercises without a decelerative phase, the part where you slow down to come to a stop at the end of the movement. They teach your nervous system to act explosively, and to utilise the force stored in an eccentric stretch, such as the wind-up for a punch, or the ducking motion before a jump. When training for power, reps should generally be limited to 6, as any fatigue will be detrimental. It is easy to overtrain on plyometrics; it's normally recommended to do them 1-4 days a week, 15-40 exercises per session (i.e. across all sets), depending on your level of development.
There are many lower-body plyometric drills, but they're mostly just slight variations on jumping, with no special benefits over simply jumping into the air, so I've thought it necessary to list only a few of the most important here. These should be all you need for a complete plyometric routine. This page describes them well and gives internal links to lists of exercises.
Depth jumps and shock jumps were the two original plyometric drills devised by Soviet sports scientist Prof. Yuri Verkhoshansky, who feels that much of what passes for plyometrics now - i.e. any jumping exercise - misses the point of the original plyometrics, namely to teach your nervous system to store compressed energy in the muscle tendon unit and release it explosively in the opposite direction. I feel that depth jumps and shock jumps should form the core of any lower-body plyometric routine. They are extremely effective exercises for increasing jumping ability, which is very important in wushu and some other martial arts.
Plyometric push-ups. From the bottom position of a push-up, push explosively off the ground to throw your upper body off the ground. An important exercise for anyone training in a martial art that punches with the power of the arm.
Plyometric pull-ups. Hang from a pull-up bar and pull yourself up explosively, letting go of the bar as you ascend, so that your hands come up above the bar.
Depth jumps. Drop (don't jump) from a height and, as soon as you hit the ground, jump up as high as possible. Your heels should not touch the ground. The height you drop from depends on your level of development. 45-70cm will do for most people, though advanced athletes use heights of up to 125cm. The horizontal distance you travel as you drop should be equal to the height you drop from.
Shock jumps. Drop from a height of 100-125cm and land as softly as possible, without your heels touching the ground. This exercise teaches you to absorb forces in your Achilles' tendon. As with depth jumps, the distance you land away from the object should be roughly equal to its height.
Jumps. Practise jumping straight up into the air and landing softly. Try it tucking your knees into your chest, bringing your feet behind you, or from one leg only.
Ankle bounces. Jump as high as you can without bending the knee, using only the ankle.
LINKS
www.drillsandskills.com - Gymnastics page including a list of floor skills, some basic conditioning info and a good links section.
www.beastskills.com - Well-written tutorials on advanced gymnastic and bodyweight conditioning skills.
http://www.dragondoor.com/articler/mode2/Workouts - Bodyweight conditioning articles on Dragon Door.
www.bodybuilding.com/fun/exercises.php?MainMuscle=&Equip=BodyOnly - Bodybuilding.com's list of bodyweight exercises.
www.ronjones.org/Coach&Train/ExercisePhotos/index.html - A list of bodyweight exercises, included many varieties of push-up.
http://www.trainforstrength.com/exercises.shtml - Guides to performing some bodyweight exercises
www.trickstutorials.com - Guides to basic acrobatic moves and an outstanding section on flexibility and stretching.
www.gymnasticsrevolution.com/GymInteractive-Index.htm - Animations demonstrating gymnastic techniques.
www.mspt47.com/gymnastics/index.php?Floor_Exercise - Guides to basic gymnastic techniques.
http://www.bodybuilding.com/fun/mahler57.htm - Mike Mahler gives instructions for a few bodyweight exercises."
|